There are many reasons for filming an interview. You may want to promote your business, train your staff members, inform your clients or simply spread a message or all of the above. Sure, you can shoot an interview just holding the camera, using the built in mic on the camera and no additional lighting. But will it look good?
Unfortunately, no.
To present your business professionally, you will want to use the methods in this article to achieve the best looking video possible.
Corporate video production that looks good
1. Frame your shot well
Framing
How you frame your shot is an integral part of your interview. A slightly askew frame can annoy your audience, as well as a shot that has way too much empty space or an image that is too close up to the talent revealing the pores of their skin!
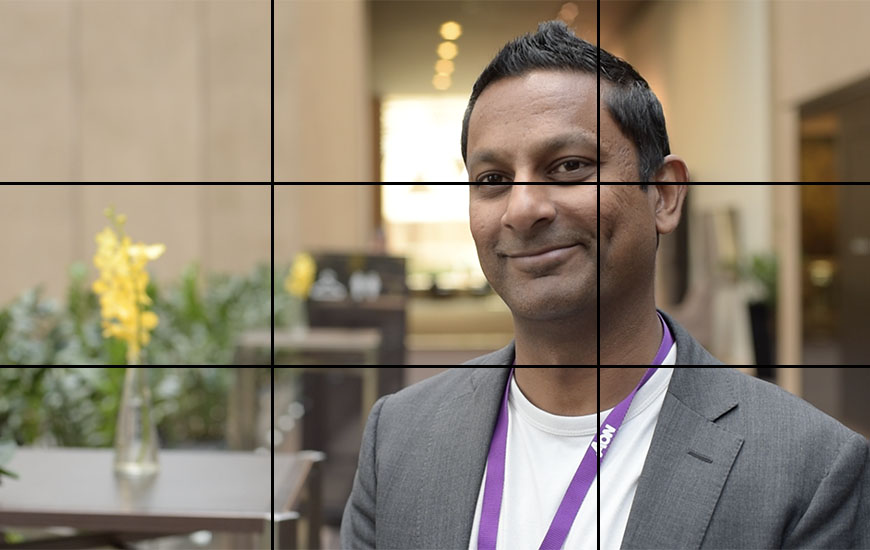
The best way to frame your talent is to use the Rule of Thirds. You should select an area mid right, mid left or centre depending on the purpose of your video.
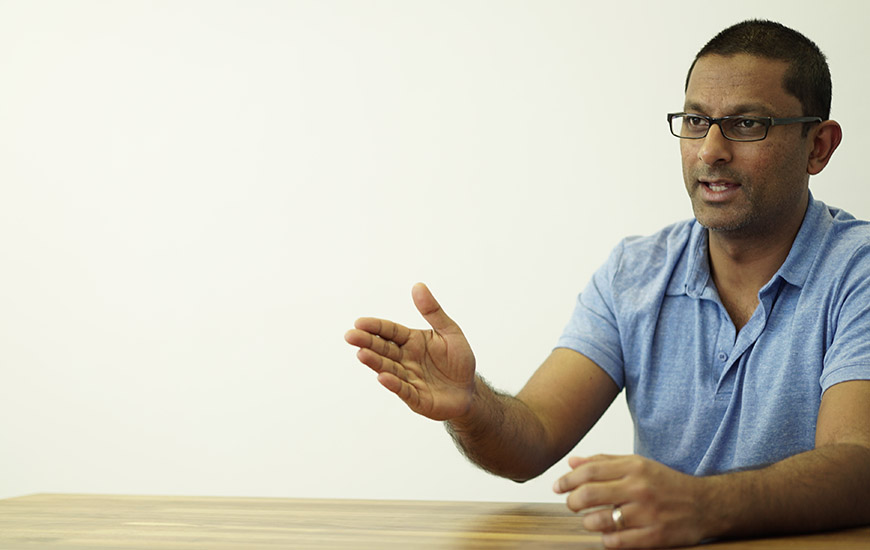
Mid Right & Mid Left Framing
This should be used for a more interview/ storyteller feel and this choice of framing will generally give your video a more relaxed feel.
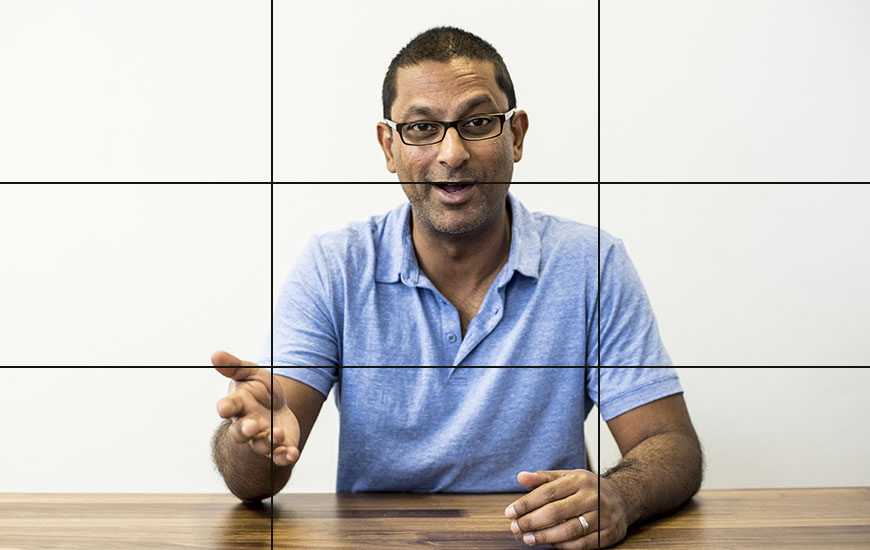
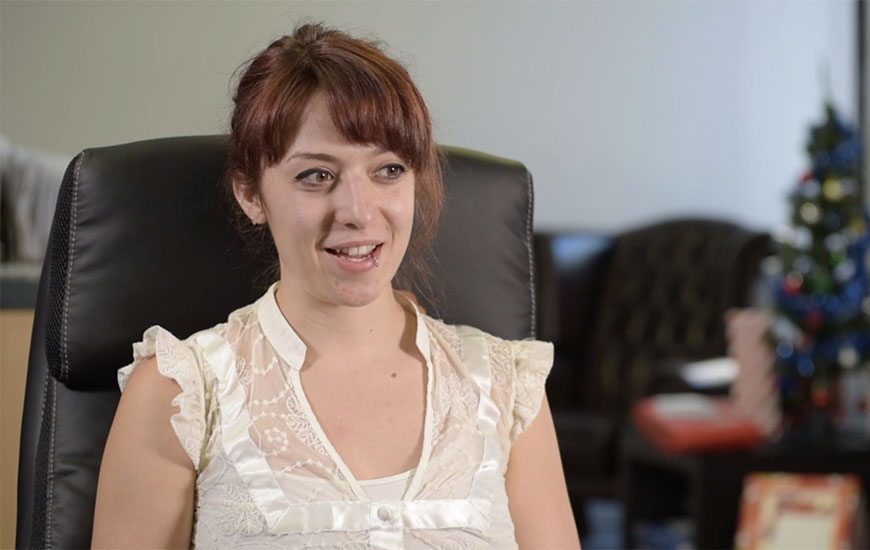
Centre Framing
This should be used when you want to talk directly to your audience. For example; in a promotional video for your business or a training video for clients/ staff.
No-Nos:
Do not frame your subjects in the extreme right or left, top or bottom of your frame. Your subject can become insignificant in the shot and it will detract from the message.
Give yourself enough room.
When shooting your talent, always make sure there is enough room on the sides, but also enough headroom from the top. You are allowed to fill the entire bottom of frame if needed.
Find your position
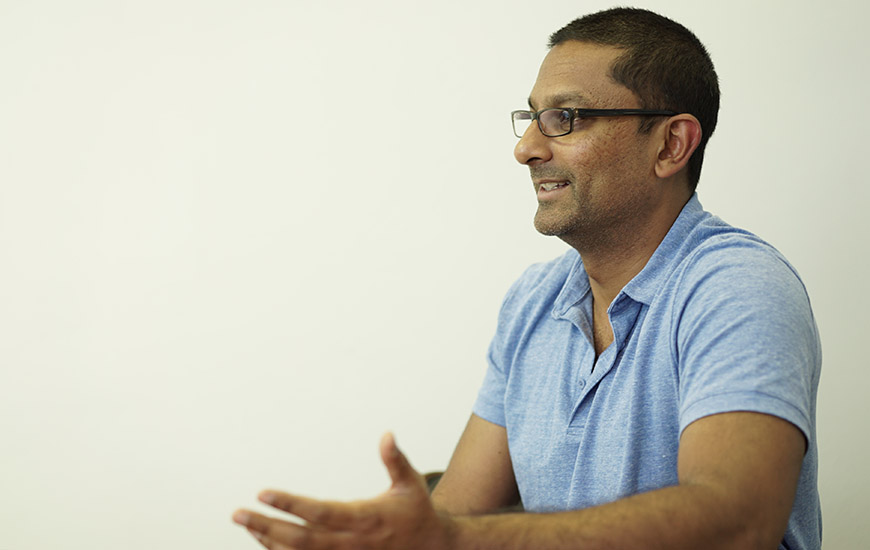
If shooting with Mid Left / Right Framing, make sure your talent has their feet and shoulders facing slightly off camera, and that they are looking off camera with their eyeline – like in the example below. In an interview, you want them to look like they are talking to the interviewer. Facing to the side (25 -45 degrees), will give the subject and frame a much more dynamic look.
Centering
If it is a promotional video, message for clients or training video it’s OK to have the talent looking straight down the barrel of the camera. Position the camera with the camera at their eye-line. If you’re shooting with centre framing, make sure you talent is facing direct to camera as if they are directly talking to the audience.

2. Use Lighting
Lights are an integral part of your shoot, as a poorly lit subject and background will ultimately detract from your audience’s viewing experience as well as looking unprofessional.
When sourcing a film location for a shoot, always make sure you find a well lit room, preferably with artificial lighting. It is best to avoid relying on natural lighting coming in through the windows when filming inside as natural weather and the movement of the sun can drastically affect your shoot. In addition, try to avoid using rooms where the ceiling lights have strong colours, such as halogens which give off a noticeable orange hue. Also avoid rooms that are only partially lit.
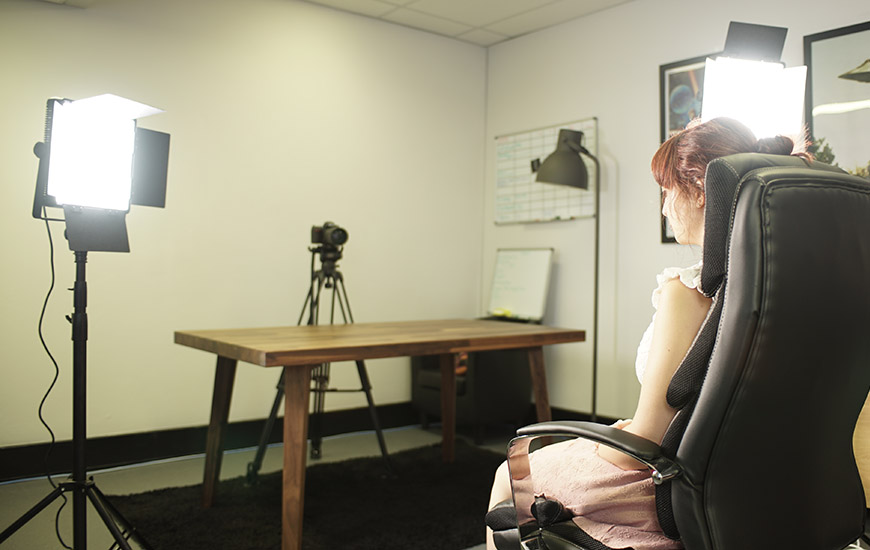
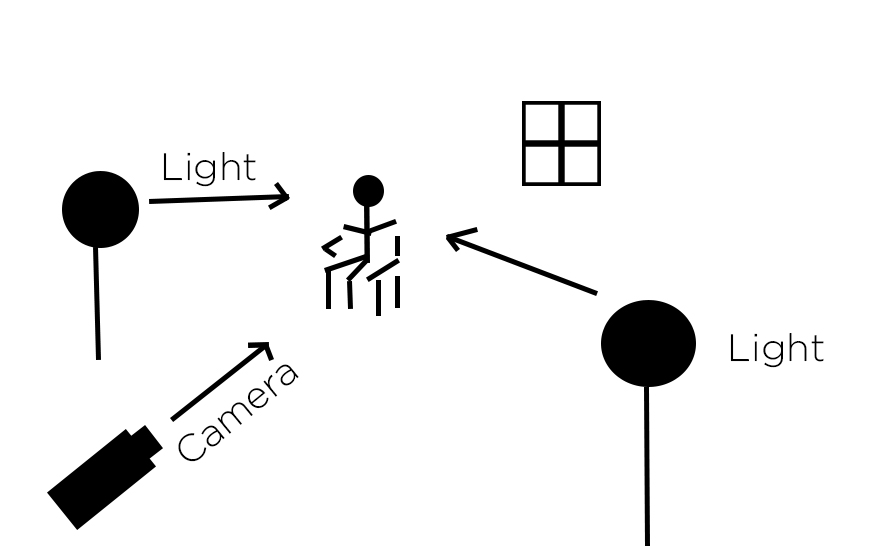
It is always recommended to shoot with at least an on-board camera light and one light on a stand if possible. Ideally, using 2 lights on light stands is preferable. Aim to light the subject from both left and right, filling their entire face with light. Make sure that the lights aren’t too bright on the subject. If they are, turn them down or move them further back.
Also if your subject is wearing glasses or shiny material, be careful of the position of the lights and how much shine it generates. If you can source a third light, you can also flood the back ground with light. This makes your image pop with colour and gives sharpness and dynamism to your shots.
No lights
One light only
2 lights
3. Use a tripod
Having a tripod on hand when shooting an interview is a given. Unless your intention is to have a hands free look with your shoot, a tripod will always give your image a professional edge. The purpose of the tripod is to stabilise your image and allow you to frame your shot well.
As a general rule of thumb, make sure the tripod and camera are set up at the height of your talent, so your talent is not looking up or down as these can be unflattering.


It is important that all the tripod legs are released equally at all points, to give even weighting to the camera and the tripod itself. Uneven weight can cause the entire setup to fall or be knocked easily to the ground.
4. Pick a good background
When choosing your background, it is integral that you choose a background that is interesting and visually pleasant. Although generally your background will be out of focus, it is important to make sure that you do not have people sitting behind the talent watching them or a background that is very messy. To make your image nicer it is highly recommended to lay out the scene neatly and with purpose.

5. Prep your talent
Whoever your talent is, there are a collection of methods that you can use to get the best out of them.
The ‘script’
Before any shoot, it is ideal that the talent is familiar with what should be said on camera.
If it is an interview, make sure the talent has a chance to see the questions beforehand so that they are not put on the spot. If they have some time to formulate ideas for their responses to the questions this can help, as long as they aren’t trying to repeat their pre-prepared answers word for word, as that doesn’t generally look good as most people struggle with this.
If it is a promotional video or training video be sure to not make the script a long one. Ideally for a promotional video, it should be less than 2 minutes. If it is a training video, break the script into bite size chunks so your talent can deliver it chunk by chunk (or use an autocue). Avoid the temptation of relying on your your talent’s abilities to nail the script in one go without some kind of preparation, breaking the script into sections or using an autocue.
Ahem, there’s a ‘dress code’.
With ‘wardrobe’, it is always better to have your talent well dressed and neatly presented. In a corporate environment, most clients opt for office wear (eg. tie, collared shirt, jacket, nice shoes, dress or top and skirt). If you are filming in a more relaxed environment or business, business casual is usually the go. If you’re interviewing hipster baristas then ditch the suit!
Conclusion
Well, there it is.
The image is a really important element of your video and these tips will get you well on your way to not only a good looking image, but closer to video production at a professional level.
Look out for my next article in the Video Production Basics series on how to capture professional audio from your video shoots.
Joel Hamilton-Foster is a Production Manager at Sydney based video production company, Rocket Productions. You’ll find more useful articles on our blog.